


iPhone Photography For Travel
Contrary to popular belief, your iPhone can take beautiful travel photos—no really, I'm serious! It also won't weigh you down like a clunky DSLR kit, and it's likely going to be in your pocket anyway, so why not simply learn to use the built in features on your phone and reduce your luggage weight?
Now don't get me wrong, I do love my DSLR and what it does. It allows me to have clean, clear, balanced photos almost every time with absolutely no photography training. But, and here's where I'm going to get really honest, I HATE carrying it. I actually dread pulling it out and packing it up for a day of exploring a new city. It weighs more than a pound or two, and by the end of the day I swear it's like I've been wearing a necklace made of rocks. If I keep it in my handbag or backpack it basically amounts to me not taking any photos at all.
As I travel more frequently, the importance of packing light has become very apparent. You just have a better time when you're not weighed down with excess stuff. There's also no better way to look like a tourist than a giant camera strapped around your neck. So, if you're anything like me and you long to travel ultra light without skimping on the necessities (i.e. beautiful photos) you've come to the right place. Throw in a couple basic photography principles, and maybe an app or two, and you'll be on your way to snapping beautiful photos of your travels that will make your friends wildly jealous. Here are my tips and tricks to improve you iPhone travel photos:
What is the story you're trying to tell?
Before we get into the technical stuff let's talk about setting your photo up. You always hear that a picture is worth a thousand words, but what the hell are those words trying to say? Ever come home from a trip and scroll through your pictures essentially finding a series of blurry selfies and close-up shots of your buddies—which could easily have been taken in your living room? Or maybe you went to a beach and you end up with 60 water shots and nothing else. Boring right? These are photos that you'll look at once and probably never again. Interesting travel photography captures details about a subject, or place, and expresses something unique about that moment in time. Not that you shouldn't have a few photos of the beautiful ocean view, or a bunch of you and your friends acting crazy, but if you want to come home with a collection of photos that tell the story of your trip, you'll need to reach a little further.
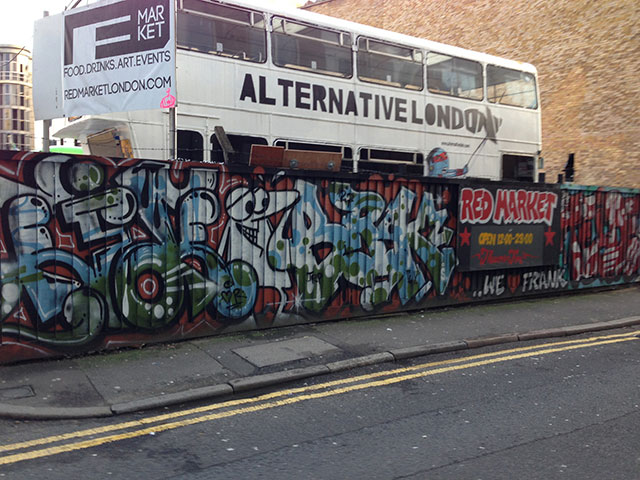
Is there something unique about where you are that you won't find anywhere else in the world? Try picking out a subject that speaks to your destination in a way that isn't obvious, yes the Eiffel Tower clearly says Paris, but so will the people, the bakeries, the antique markets, the architecture, and street graffiti.
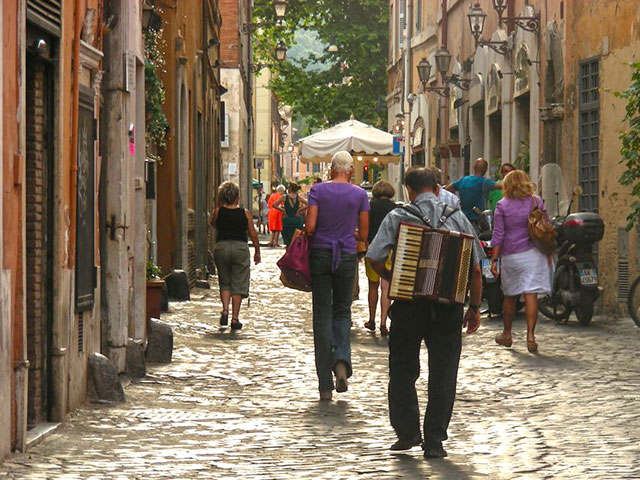
Look for a scene that tells the story of the experience you're having at that moment, instead of relying on the obvious postcard image you see at the gift shop. Some of my favorite photos are of random people on the street or iron work on the side of an old building. Here's a shot I took in Rome of a man carrying an accordion on his back walking the cobble streets. Without literally saying Rome with a shot of the Colosseum, I feel like this says Rome in an understated and interesting way, and it speaks to my experience. I'm not saying to skip all those other shots of monuments, just add a few that are more personal, something that speaks to your own experience and I'm sure you'll be happy you did. Now on the the technical stuff!
Framing your photo
Rule of Thirds
The rule of thirds sounds like you need to know some sort of complex math equation, trust me you don't. Simply put the rule of thirds in photography means that you divide the image you see on your screen into a grid of thirds. Two horizontal lines and two vertical lines creates a grid with 9 equally sized boxes, like this:
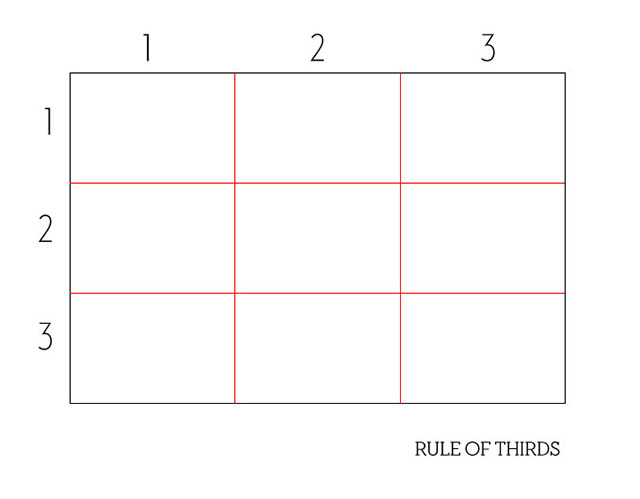
The idea is to line up important details of your shot with one of the red intersections on the grid. This tends to go against the instinctive armature urge to focus every shot in the dead center of a photo. It might feel weird at first, but this is actually one of the main techniques that will help you capture really well proportioned shots. And the good news is, this grid is built right into your iPhone! If you don't see the grid drawn on your screen when you open up your camera app it's because you're grid setting is turned off. To turn it on go into your settings, scroll down to the Photo & Camera section and open it up. You'll see a button called 'Grid' just slide that toggle to on. Now when you open your camera app you should always see your image divided into thirds. To start using this feature try lining your subject up with one of the intersections. If you are shooting a landscape try positioning the horizon line to line up with one of the horizontal lines. If it's a tall monument or a full length body shot of a person, try lining the center of the building or body to one of the vertical lines.

In this image taken at the Tsukiji fish market in Tokyo, I've lined the eye line of the man working behind the counter with the intersection at the top left corner. He's staring off in the distance while his customers finish their curry, and although I can't see what he's looking at I'm intrigued. For close up detail shots, say of a flower, line up the focal point of the image in one of the cross sections. Don't worry if the if there's extra space on one side, I'll get to that in a minute. What you want to do here is get use to using the grid so that it becomes almost second nature. Truly great photographers will sometimes break this rule and create spectacular compositions, but if you're a novice like me, it's best to learn the rules before you go breaking them. This one change in the way you set up a photo can take your photos from humdrum to 'when did you take a photography class?!' And isn't that the reaction you want?
Negative Space
In the world of design and composition, negative space is actually a very positive thing. It allows beauty to breath without feeling crammed, squished or cluttered. Negative space doesn't have to be completely empty or void, it can contain people, items, blurred color, or scenery, but those things just shouldn't be the main focus. As mentioned above when you line up your images using the rule of thirds you'll find that your focal point won't be centered, but rather to one side. That's okay, really it is. If you can set up your shot so that the 'negative' space isn't distracting but rather compliments your focal point you'll end up with a really lovely shot. For instance, say you're taking a photo in Naples of a church or a building on one of the narrow streets. Perhaps your focal point of the building is to the left and in the distance on the right you capture some of the city life, an old woman carrying grocery or maybe a couple riding a Vespa. Or maybe the background is slightly out of focus giving just a hint of the colorful shops that line the streets. In both of these scenarios your photo will look much more interesting than a centered, close crop picture of the building.
Scale
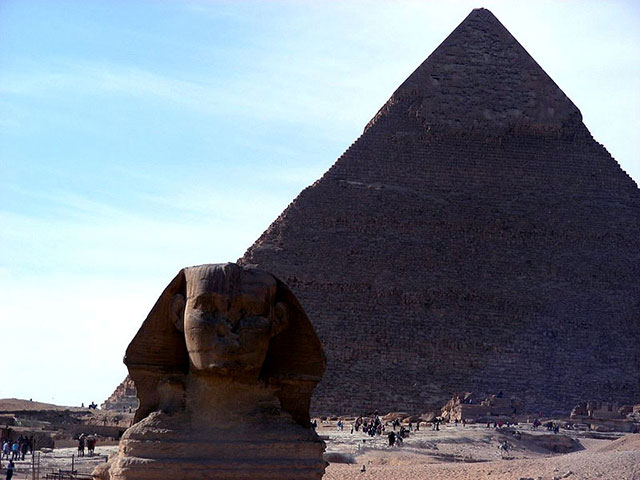
How large (or small) is your subject? Don't make the viewer guess, make it a part of your story. Include a surrounding object that will help them figure it out. Want to show how surprisingly small something is? Take a photo with a common object or person beside it which will make its tiny scale obvious. For instance, want to make a great pyramid look huge? Then take a picture with a camel or people at the base to show how much larger it is. Scale is a really great way to create impact in your photos, if everything is the same size, nothing really stands out.
Context
Travel photography is all about showing how something contextually relates. As I mentioned above sometimes you see photos of people or things that could have been taken anywhere in the world. To create some context try adding an element to your shot that's unique to the place you are, which will communicate to show the viewer where the photo was taken. For example, here is a photo I took outside a noodle restaurant. If you look at the image you can't really tell where the photo was taken.

But by framing the same shot with a little context you can tell that this was taken in Toronto's China town, see the CN tower in the background? That way if the viewer wants to know more about where the photo was taken they can simply search the rest of the photo for clues.

Light
If you've ever spoken to a photographer you'll know how important 'finding the light' is. Lighting in photography determines if your photo is under or over exposed, can create shadows on your subjects, and can be manipulated hundreds of different ways to create different outcomes in your shots. If you're taking photos in bright sunlight you can end up with a lot of squinting from your subject or possibly and over exposed shot with bright lens flare. Ensure that when you are shooting in bright sunlight you've arranged your shot so the sunlight doesn't create problems but instead highlights your subject. A slightly overcast day will actually lend itself to beautiful outdoor shots, as you get the bright daylight without the direct sun glare. When taking photos of outdoor monuments or events, move around your subject to find the best placement where the shadows fall in a pleasing way. Also, if possible, returning to a spot at different times of day will get you a completely different photo. Something taken in the bright, sunshiny day will look like a totally different when covered with the moodiness of starlight.
Learn to use your camera phone
You might be rolling your eyes at that, since it is kinda why you started reading this article, but what I mean is specifically how the functions work. The other day a friend (who is a long time iPhone user) confessed she didn't use her iPhone camera because she couldn't get clear photos. I asked her if she was using the AE/AF lock function to focus, and she told me she had never heard of it before. Knowing the features on your camera app can drastically improve your photos, and just like any DSLR camera, the more you know about how if works the better you'll be able to use it.
Focus
There's really nothing worse than opening up a travel photo and finding instead of the clear, sharp image you remember taking, you actually ended up with what can only be described as Bigfoot sighting—blurry and impossible to make out. To avoid this irritating situation learn to use your AE/AF lock feature on your iPhone camera app. AE (automatic exposure) and AF (autofocus) are terms you might know from your DSLR, you might even be familiar with it on your phone, but do you know how to use it properly? When your camera app is open if you tap on the screen a square approximately 1" around will pop up under your finger, this is the AE/AF lock feature. Essentially where ever you tap you are telling the camera to lock in on that specific point and to expose and focus for that area. But to have it work properly (i.e. actually focus and expose the area you specified) you need to hold your finger on the spot until you see a larger square pop up twice. This signal of two large squares will tell you the photo settings are ready and you can safely take your shot with the proper focus and exposure highlighting that area.
Reduce Shake
Depending on how shaky you are (or how many drinks you've had) holding your camera still is probably one of the biggest issues you'll face. Just like with a regular camera, hold it with two hands and exhale as you take your shot, to reduce camera shake. If you do that and still find you're getting blurry photos try stabilizing your arms on your body or a ledge to help reduce shake even further. Also did you know you can also use the volume buttons on the side of your phone to control your shutter (i.e. take the photo) instead of the button on the screen? Some people claim using the up or down volume button reduces the shake they get when they use the screen button, giving them clearer more focused shot. It's worth a try if you have trouble using the screen button, although personally I find using when you use the volume button you have to push harder and it actually creates more movement than the screen tap, but to each their own.
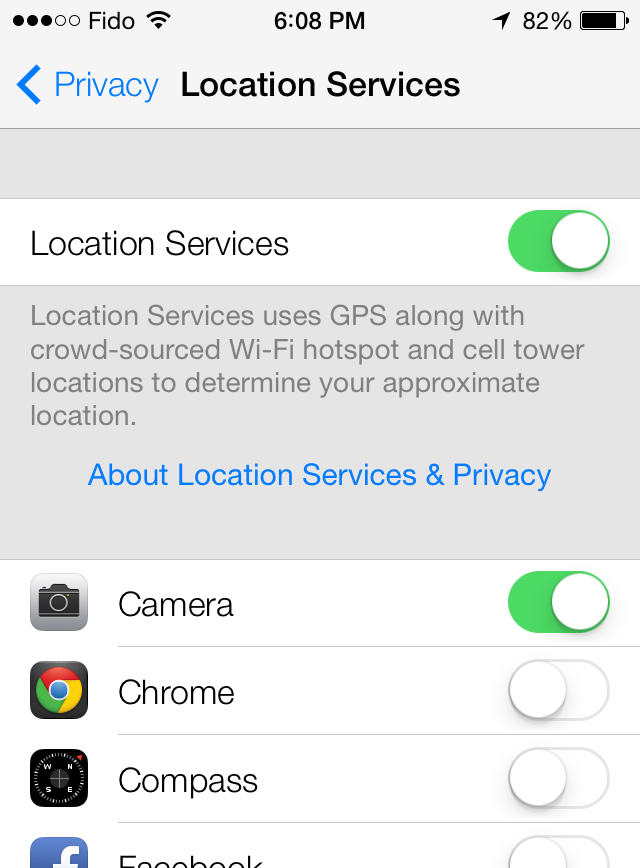
Location tagging
iPhone allows your to attach the geographic coordinates to a photo, a feature available to DSLRs with an expensive attachment. I know what you're thinking, "WTF? I'm not Magellan? Why would I need GPS coordinates of my photos?" Two reasons. One, this data helps applications like Flickr, Facebook, and iPhoto place your photos on a map so you can show off/remember where you've been visually. Two, it helps iPhoto and Lightroom to automatically separate events by data and location—a tedious process that's more likely to get done if they're already separated on import. It's really easy to use, just enable location data under your privacy settings. If you're roaming, even with your roaming data turned off it it will use cellular triangulation to figure out where you are, as long as you're getting a signal.
Download an iPhone Camera App
I shoot with an iPhone 5, and to be honest I can get pretty decent photos just using the built in camera app. However there are a few apps out there that can help you improve your photos, and since they don't cost a lot, why not give them a try? Out of all the apps I've tried there is only one that I go back to time and time again, and so it's the only one I would recommend.
Camera+: $1.99
This app has been around for a while and it is much loved in iPhone photography circles. There are a number of functions such as 'clarity' which will boost the light and well, clarity in your photos. Clarity is best used in darker situations, when used in bright light outdoors it can make your photo look like you have a cheesy filter applied. 'Touch exposure' is my favorite feature. This works much like the regular camera app where you touch to focus on an area, however if you touch a second time and add a finger to your screen a light source circle will appear which you can manually move around your screen. So, you're focusing on one area and lighting another! Moving the light around will quickly change the way your photo looks, and gives you much more control of the photos final look. This app allows you to add filters and even adjust them, crop your images, and of course share them. With this app you can also save your preferred settings, so it will apply your presets to each photo you take. You can get it here.
There are plenty of other apps that will mash up your photos, add crazy filters, and help you with editing, however for travel photography I like to keep my images looking as close to what I actually saw as possible. So there you have it, a few tips and tricks to help you create better iPhone photos on your travels. Feel free to send me your best shots!